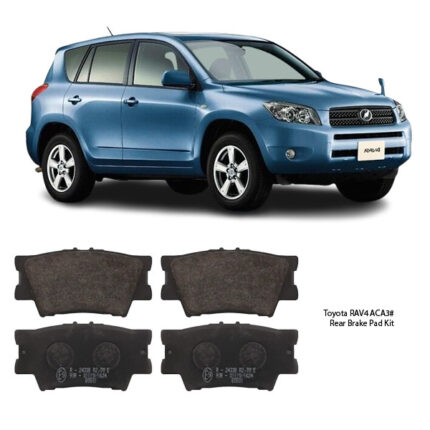

Get Toyota RAV4 ACA3# Rear Brake Pad Kit D2269 in Kenya
A Rear Brake Pad Kit is a critical component in the braking system, designed to provide friction against the brake disc (rotor) to reduce speed and bring the system to a controlled stop. The rear pads, though not as heavily loaded as the front ones, play a vital role in vehicle stability, balance, and braking efficiency.
Typically, a rear brake pad kit includes two pairs of brake pads — one for each side — and may come with installation accessories such as anti-noise shims, wear indicators, and sometimes high-temperature grease for smooth operation. A well-made kit ensures precise fitment, consistent performance, and safety under a variety of conditions.
Advantages of a High-Quality Rear Brake Pad Kit
✅ 1. Reliable Braking Performance
A good rear brake pad kit delivers consistent stopping power. The material is formulated to generate optimal friction without overheating or wearing down prematurely. This results in smooth and predictable braking action across a wide range of temperatures and conditions.
✅ 2. Reduced Brake Noise
Premium kits often feature noise-dampening shims and backing plates. These additions help eliminate annoying squeals or grinding sounds during braking, ensuring a quieter and more refined experience.
✅ 3. Lower Brake Dust Emission
Quality rear brake pads tend to release minimal dust when worn. This not only keeps the system cleaner but also prevents buildup on surrounding components, reducing maintenance requirements and extending part life.
✅ 4. Extended Lifespan
Durable friction material and proper heat resistance mean longer service intervals and fewer replacements. Quality pads are engineered to resist cracking, glazing, and rapid degradation.
✅ 5. Rotor Preservation
The right rear pads are designed to wear evenly and avoid excessive scoring of the brake rotors. This extends the life of the entire braking system and improves overall system health.
Disadvantages of a Poor-Quality Rear Brake Pad Kit
❌ 1. Inconsistent Braking
Low-grade pads may offer poor or unpredictable friction, especially under heat or load. This inconsistency can lead to delayed or weak braking response, increasing the risk of failure.
❌ 2. Excessive Noise
Cheap rear pads often lack proper shims or backing materials. The result is frequent squeaking, squealing, or grinding noises — especially during cold starts or light braking.
❌ 3. High Brake Dust
Inferior materials tend to wear quickly and shed large amounts of brake dust. This can cake onto wheels, surrounding hardware, and calipers, requiring more frequent cleaning and inspections.
❌ 4. Rapid Wear and Glazing
Poor heat dissipation leads to overheating, causing the pad surface to glaze or harden, drastically reducing effectiveness. These pads also tend to wear unevenly, demanding premature replacement.
❌ 5. Rotor Damage
Low-quality pads can be abrasive or uneven, leading to rotor scoring, pitting, or warping. Such damage often requires rotor replacement — a much costlier repair than pad replacement.
Signs That Rear Brake Pads Are Worn Out
Timely inspection of the braking system can prevent further damage. Some of the most common signs that rear brake pads need replacement include:
-
Squealing or Screeching Noises: High-pitched sounds during braking often signal wear indicators rubbing against the rotor.
-
Grinding Sounds: A metallic grinding noise typically means the pad material has worn down completely, and the backing plate is contacting the rotor.
-
Reduced Braking Performance: Increased stopping distances or a softer pedal feel can suggest thin or uneven brake pads.
-
Vibration or Pulsation: Worn-out pads may cause uneven rotor contact, leading to vibrations when braking.
-
Visible Wear: If the pads appear to be less than 3mm thick upon inspection, replacement is strongly recommended.
-
Burning Smell: A sharp, chemical odor after braking could indicate overheated or failing brake components.
How to Replace Rear Brake Pads
Replacing rear brake pads is a manageable task with the right tools and attention to safety. Below are the general steps involved:
🛠 Tools and Materials Needed
-
Jack and jack stands
-
Lug wrench
-
Socket set or spanners
-
Brake cleaner
-
C-clamp or caliper piston tool
-
New rear brake pad kit
-
High-temperature brake grease
🛠 Replacement Procedure
-
Lift the System: Safely elevate and support the unit using a jack and jack stands. Ensure it’s secure before beginning work.
-
Remove the Rear Wheels: Loosen the lug bolts and take off the wheels to access the brake assembly.
-
Detach the Brake Caliper: Remove caliper bolts and slide the caliper off the rotor. Avoid straining any attached lines or cables.
-
Extract the Old Pads: Slide out the worn brake pads. Observe their condition to check for uneven wear or damage.
-
Compress the Caliper Piston: Use a C-clamp or dedicated piston tool to push the piston back into the caliper. This creates room for the new, thicker pads.
-
Install the New Pads: Apply anti-squeal grease to contact points and insert the new pads. Secure any clips or shims provided in the kit.
-
Reattach the Caliper: Position the caliper over the new pads and torque the bolts to specification.
-
Reinstall the Wheel: Mount the wheel back and tighten the lug nuts.
-
Test the System: Before normal operation, pump the brakes several times to seat the new pads properly.
How to Maintain Rear Brake Pads
Maintaining rear brake pads not only ensures long service life but also contributes to overall braking efficiency. Here are effective maintenance practices:
🔧 1. Regular Inspection
Visually check pad thickness and rotor condition every few months. This helps catch issues early before they escalate.
🔧 2. Avoid Aggressive Braking
Frequent hard stops lead to rapid pad wear and heat buildup. Practice smooth, gradual braking to reduce strain on the system.
🔧 3. Keep the System Clean
Use brake cleaner to remove dust, dirt, and grime from the braking components. Clean systems perform better and last longer.
🔧 4. Replace in Pairs
Always replace both rear pads at the same time. This ensures balanced braking force and prevents uneven wear.
🔧 5. Lubricate Contact Points
Apply high-temperature brake grease to the caliper pins and contact surfaces during pad replacement. This prevents binding and reduces noise.
🔧 6. Allow Proper Break-In (Bedding)
After installing new pads, avoid harsh braking for the first 200–300 km. Gradually increasing braking pressure helps the pads seat correctly and reduces glazing.
Follow us on Facebook for more parts.