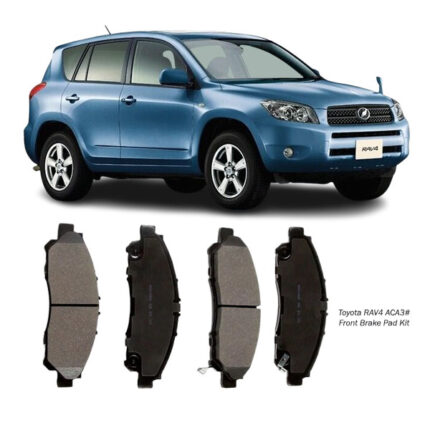

Get Toyota RAV4 ACA3# Front Brake Pad Kit D2268 in Kenya
The front brake pad kit plays a pivotal role in a vehicle’s braking system. It directly contributes to the ability of a vehicle to stop safely and efficiently. As vehicles decelerate, the braking system transforms kinetic energy into heat via friction, and the front brake pads absorb most of this force due to weight transfer to the front axle. Maintaining the front brake pad kit in good condition is essential for safe driving, predictable stopping distances, and long-lasting braking components.
A typical front brake pad kit includes not just the pads themselves but also supporting components like shims, clips, and wear indicators. These parts are designed to work together to ensure reliable braking performance while minimizing noise, vibration, and premature wear.
Function of the Front Brake Pad Kit
When the brake pedal is pressed, hydraulic pressure from the brake fluid forces the caliper pistons to push the brake pads against the spinning rotors. This contact creates friction, which slows the rotation of the wheels and, ultimately, the vehicle. The amount and quality of friction generated depends heavily on the condition and type of brake pads in use.
Front brake pads face higher stress compared to rear ones because the vehicle’s momentum shifts forward during braking. As a result, the front pads typically wear out faster and demand more frequent attention and replacement.
Components of a Front Brake Pad Kit
-
Friction Material
The friction surface is bonded to a steel backing plate and is responsible for making contact with the rotor. It can be made of ceramic, semi-metallic, or organic compounds, each offering different performance characteristics. -
Backing Plate
This is the steel plate that holds the friction material in place and transfers the braking force from the caliper pistons. -
Shims
Thin layers of rubber-coated metal or composite material are attached to the back of the pads to reduce vibration and eliminate brake noise. -
Anti-Rattle Clips
These clips hold the pads securely in the caliper bracket and prevent movement that might cause noise or uneven wear. -
Wear Indicators
These can be mechanical (producing a squealing noise when the pad wears down) or electronic (triggering a dashboard alert when the pad reaches its minimum thickness). -
Grease Packets (Sometimes Included)
Brake-specific grease may be included in the kit to lubricate the contact points between pads and caliper, minimizing noise and wear.
Advantages of a Quality Front Brake Pad Kit
-
Reliable Braking Power
A quality kit ensures optimal friction between the pads and rotors, allowing consistent and predictable stopping performance in various driving conditions. -
Reduced Stopping Distance
Superior friction materials help shorten braking distances, which is crucial for driver and passenger safety. -
Low Brake Fade
Well-designed pads maintain performance even under repeated hard braking by effectively dissipating heat. -
Quiet Operation
With proper shims and clips, a good brake pad kit will operate silently, free from squeals or grinding noises. -
Longer Service Life
Durable friction compounds and proper hardware ensure even wear and longer pad lifespan. -
Protection of Rotors
Good-quality pads reduce the risk of scoring or damaging rotors, which would otherwise lead to expensive repairs. -
Reduced Maintenance Costs
Since quality pads wear evenly and reduce stress on related components, overall maintenance costs remain lower over time.
Disadvantages of Worn-Out or Low-Quality Brake Pads
-
Reduced Braking Efficiency
Cheap or worn-out pads may not generate sufficient friction, leading to slower stops and increased risk in emergency situations. -
Excessive Noise
Worn pads often squeal or grind due to metal-on-metal contact or lack of anti-noise features like shims. -
Increased Rotor Wear
Abrasive pad materials or uneven wear can damage the rotor surface, causing grooves or warping. -
Brake Fade
Inferior materials may overheat easily, resulting in brake fade — a dangerous loss of braking performance. -
Vibration or Pulsation
Unevenly worn pads or misalignment can cause the steering wheel or brake pedal to vibrate during braking. -
Dust and Debris
Some pads generate excessive brake dust, which can dirty wheels and harm the braking components over time.
Signs That Front Brake Pads Need Replacement
-
Squealing or Screeching
A high-pitched noise when braking often indicates the presence of a wear indicator contacting the rotor. -
Grinding Noise
A metallic grinding sound is usually a sign that the friction material has completely worn away, exposing the backing plate. -
Poor Braking Response
If the vehicle takes longer to stop or feels less responsive under braking, the front pads may be worn or overheating. -
Vibration During Braking
Pulsation through the steering wheel or brake pedal can be caused by unevenly worn pads or damaged rotors. -
Visible Wear
If the friction material is visibly less than 3 mm thick or uneven, it’s time for replacement. -
Dashboard Brake Warning Light
Some systems use electronic wear sensors that trigger a warning light when the pads are nearing the end of their lifespan.
How to Replace Front Brake Pads
Tools and Supplies Needed:
-
Jack and jack stands
-
Lug wrench
-
Socket wrench and breaker bar
-
C-clamp or caliper piston tool
-
Brake cleaner
-
Torque wrench
-
Front brake pad kit
-
Gloves and safety glasses
Step-by-Step Process:
-
Preparation
Park the vehicle on a level surface, apply the handbrake, and chock the rear wheels. -
Lift and Secure
Use a jack to raise the front end and place it on jack stands. Remove the front wheels. -
Remove Caliper Bolts
Locate and remove the bolts holding the caliper in place. Slide the caliper off and secure it to avoid stress on the brake hose. -
Remove Old Pads
Slide out the worn pads. Clean the caliper bracket with brake cleaner and inspect for damage. -
Compress Caliper Piston
Use a C-clamp or caliper tool to slowly push the piston back into the caliper. This creates space for the new, thicker pads. -
Install New Pads
Apply brake grease to contact points if provided. Insert the new pads and any clips or shims included in the kit. -
Reinstall Caliper
Place the caliper back over the pads and secure it with bolts, torquing to the recommended specification. -
Reinstall Wheels
Mount the wheels back on and tighten lug nuts by hand. Lower the vehicle and finish torquing the lugs in a crisscross pattern. -
Pump the Brake Pedal
Before driving, press the brake pedal several times to seat the pads and restore full hydraulic pressure. -
Test Drive
Drive at moderate speeds, testing the brakes gently to ensure proper installation and to begin bedding in the new pads.
Follow us on Facebook for more parts.