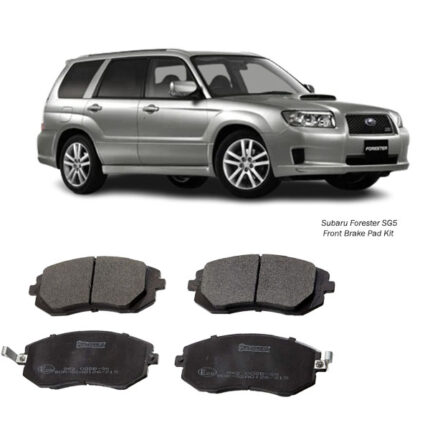
Get Subaru Forester SG5 Front Brake Pad Set D7055 in Kenya
The Front Brake Pad Set is one of the most vital components in a vehicle’s braking system, playing a direct role in stopping performance, vehicle safety, and driver confidence. While brake pads may appear simple at first glance, their role is both complex and essential. Positioned in the brake caliper, the front pads clamp onto the brake disc (or rotor) whenever the driver presses the brake pedal. This friction generates the stopping power that brings the vehicle to a halt.
Given that over 70% of braking force is applied to the front wheels during normal driving, front brake pads endure more stress and wear than their rear counterparts. Whether you’re commuting in traffic, navigating mountain roads, or braking hard in an emergency, the front brake pads must always be in optimal condition.
What is a Front Brake Pad Set?
A Front Brake Pad Set consists of two or four pads (depending on vehicle design) installed on both sides of the front disc rotors. They are made from high-friction materials bonded to a steel backing plate. When the brake pedal is pressed, hydraulic force pushes the caliper pistons outward, squeezing the brake pads against the rotating disc. This friction slows and eventually stops the vehicle.
Brake pads must be tough enough to endure high heat, pressure, and moisture while delivering consistent braking without fading or causing excessive wear to the disc.
Components of a Brake Pad Set
-
Friction Material
-
The part that contacts the disc.
-
Made from semi-metallic, ceramic, organic, or carbon-based compounds.
-
Designed to offer high friction with minimal wear and noise.
-
-
Backing Plate
-
The metal plate that holds the friction material.
-
It transfers braking force from the caliper to the friction surface.
-
-
Shims and Insulators
-
Often included to reduce noise and vibration.
-
Help in damping the contact between pad and caliper.
-
-
Wear Sensors (Optional)
-
Provide alerts when pads are worn out.
-
Can be mechanical (audible squeal) or electronic (dashboard warning).
-
Types of Brake Pad Materials
1. Semi-Metallic Pads
-
Made from a mix of metals (iron, copper, steel) and friction modifiers.
-
Offer strong performance and heat resistance.
-
Suitable for most daily driving and performance applications.
-
May produce more dust and wear out rotors faster.
2. Ceramic Pads
-
Made from ceramic fibers and bonding agents.
-
Quieter, cleaner, and longer-lasting.
-
Ideal for urban and highway driving.
-
Generally more expensive.
3. Organic (Non-Asbestos Organic – NAO)
-
Made from natural materials like rubber, carbon, or Kevlar.
-
Softer and quieter but wear out faster.
-
Suitable for lighter vehicles and everyday use.
4. Low-Metallic NAO
-
Similar to organic pads but include small amounts of metal.
-
Better heat transfer and braking performance than organic.
-
Moderate dust and noise.
Advantages of a High-Quality Front Brake Pad Set
1. Consistent Stopping Power
High-quality pads provide reliable braking across a wide range of temperatures and driving conditions, including rain, traffic, and high-speed stops.
2. Improved Safety
Front pads carry most of the braking load. Quality components reduce stopping distances and enhance driver control during emergencies.
3. Reduced Brake Fade
Good pads resist overheating, maintaining effectiveness even after repeated hard stops or during downhill braking.
4. Longer Service Life
Premium materials last longer, reducing the frequency of replacements and associated labor costs.
5. Quieter Braking
Pads with integrated shims and sound-dampening layers minimize squealing and vibrations.
6. Minimal Dust Production
Ceramic and low-dust formulas help keep wheels cleaner and reduce maintenance effort.
Disadvantages of Worn or Poor-Quality Brake Pads
1. Increased Stopping Distance
Worn pads have reduced friction, requiring more distance to stop the vehicle—especially dangerous in emergencies.
2. Brake Fade
Inferior pads may overheat and lose effectiveness when used continuously, such as during downhill driving or towing.
3. Noisy Operation
Low-quality or worn pads often squeal, grind, or chatter—indicating possible damage to rotors or other brake components.
4. Damage to Rotors
Worn pads can expose the metal backing, causing grooves and scoring on the brake disc, leading to expensive repairs.
5. Vibration During Braking
Uneven wear or contaminated pads may cause shaking, pulsing, or a spongy brake pedal feel.
Signs Your Front Brake Pads Need Replacement
-
Squeaking or grinding noise during braking
-
Reduced braking performance
-
Vibration or pulsation when pressing the brake pedal
-
Brake warning light on the dashboard
-
Vehicle pulling to one side during braking
-
Pad thickness less than 3mm
-
Visible scoring or discoloration on the disc
Regular inspection of your brake pads every 10,000 to 15,000 kilometers is recommended. Most pads last between 30,000 to 70,000 kilometers, depending on usage.
Installation Guide for a Front Brake Pad Set
Replacing front brake pads is a relatively straightforward process for a skilled mechanic or DIYer with the right tools.
Tools Needed:
-
Jack and jack stands
-
Lug wrench
-
Socket/ratchet set
-
C-clamp or brake caliper tool
-
Brake cleaner
-
Anti-squeal grease
-
Torque wrench
Step-by-Step Process:
-
Secure and Lift Vehicle
-
Park on a level surface and loosen lug nuts.
-
Jack up the car and place it securely on jack stands.
-
-
Remove Wheel
-
Take off the front wheels to expose the brake calipers.
-
-
Access Brake Pads
-
Unbolt the caliper and slide it off the rotor.
-
Suspend it with a wire—never let it hang by the brake hose.
-
-
Remove Old Pads
-
Slide out the old brake pads. Note their orientation and placement.
-
-
Compress Caliper Piston
-
Use a C-clamp to push the piston back into the caliper to accommodate the new, thicker pads.
-
-
Install New Pads
-
Insert the new pads into the caliper bracket. Apply anti-squeal compound if recommended.
-
-
Reattach Caliper
-
Reinstall the caliper over the new pads and torque the bolts to spec.
-
-
Reinstall Wheel and Lower Vehicle
-
Reattach the wheel, tighten lug nuts, and lower the vehicle.
-
-
Bed-in the Pads
-
Perform a series of gentle stops to help the new pads seat into the rotors properly.
-
Follow us on Facebook for more parts.