

Get Nissan Latio SC11 Rear Brake Drum Assy DN1319 in Kenya
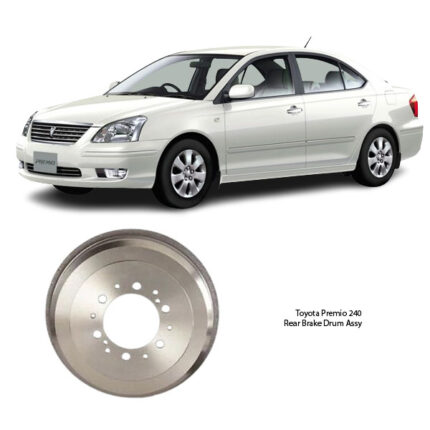
The Rear Brake Drum Assembly is a fundamental part of a drum brake system, commonly found in the rear wheels of many vehicles. It works by using brake shoes that press outward against the inside of the drum, creating friction that slows or stops the wheel. The assembly includes the brake drum itself and often integrates associated components such as wheel cylinders, backing plates, and return springs.
Brake drums are typically made of cast iron, a material chosen for its excellent wear resistance, strength, and thermal properties. While disc brakes are widely used for front wheels due to their heat dissipation capabilities, drum brakes continue to be favored in the rear for their durability, self-energizing effect, and effectiveness as parking brakes.
Advantages of a High-Quality Rear Brake Drum Assembly
Using a well-engineered, durable rear brake drum assembly brings several key advantages:
1. Strong and Reliable Braking Force
A good brake drum ensures consistent contact with the brake shoes, delivering smooth and controlled deceleration. It maintains braking efficiency across various load conditions and driving environments.
2. Self-Energizing Effect
The drum brake system amplifies braking force through a self-energizing action. As the shoes press against the rotating drum, the rotation helps pull the shoes more firmly into contact, requiring less input from the driver or hydraulic system.
3. Long Service Life
A high-quality brake drum, made from precisely cast and machined materials, resists wear and maintains performance over time. It can handle thousands of braking cycles with minimal degradation, especially when paired with quality brake shoes.
4. Heat Resistance
While not as ventilated as disc brakes, well-designed drums are engineered to absorb and dissipate heat efficiently during normal braking. This prevents thermal cracking and warping under standard operating conditions.
5. Effective Parking Brake Integration
Rear brake drum assemblies are well-suited to parking brake systems. When integrated with a mechanical parking brake mechanism, the assembly holds the vehicle securely in place even on inclines.
6. Cost-Efficient Maintenance
Compared to disc brake systems, drum brakes tend to require less frequent replacement under typical rear-axle use. The enclosed design protects internal components from debris, reducing wear and extending service intervals.
Disadvantages of a Poor-Quality or Damaged Brake Drum
When a rear brake drum assembly is poorly manufactured or excessively worn, it can lead to various performance and safety issues:
1. Reduced Braking Efficiency
Inferior material quality or surface imperfections may cause uneven friction, decreasing the braking force and extending stopping distances.
2. Overheating and Brake Fade
Low-grade drums are more prone to heat retention, which can lead to overheating during prolonged braking. This results in brake fade, where frictional force drops significantly, affecting driver control.
3. Vibration and Noise
Warped or unbalanced drums cause brake judder, vibration through the pedal or chassis, and audible squealing or grinding noises during braking. This discomfort also puts stress on adjacent components.
4. Accelerated Shoe Wear
An uneven drum surface leads to premature and uneven wear of the brake shoes. This increases maintenance frequency and costs.
5. Compromised Safety
A faulty drum may crack or fail under load, especially when operating under high temperatures or with worn-out shoes. This can pose a serious hazard to the vehicle and its occupants.
Signs That a Rear Brake Drum Assembly May Need Replacement
Recognizing the signs of a worn or faulty brake drum is essential for safe vehicle operation. Common indicators include:
1. Brake Noise
Squealing, scraping, or grinding sounds when braking often indicate worn shoes or a damaged drum surface. These noises can also stem from contaminated or rusted surfaces inside the drum.
2. Pedal Pulsation
Vibration or pulsation in the brake pedal during braking suggests the drum is out of round (not perfectly circular). This condition affects braking consistency and driver comfort.
3. Extended Stopping Distance
If the vehicle takes longer to stop or the brakes feel less responsive, the drum’s internal surface may be glazed or worn, reducing friction with the shoes.
4. Soft or Spongy Brake Pedal
Air in the brake lines or failing wheel cylinders within the drum assembly can result in a soft pedal feel. A visual inspection of the drum assembly may reveal internal leaks.
5. Uneven Braking or Pulling
A damaged drum or improperly adjusted shoes can cause the vehicle to pull to one side during braking. This uneven braking force must be addressed promptly.
6. Brake Fluid Leakage
A leaking wheel cylinder inside the drum can contaminate the shoes and inner drum surface, severely reducing braking ability. Fluid on the backing plate or inside the drum signals a need for replacement or repair.
How to Fit a Rear Brake Drum Assembly
Replacing the rear brake drum assembly involves a series of steps. It is advisable to follow all safety precautions and reference the service manual when performing the procedure.
1. Preparation
-
Park the vehicle on a flat surface and engage the parking brake.
-
Loosen the rear wheel lug nuts slightly.
-
Jack up the rear of the vehicle and place it securely on jack stands.
-
Remove the rear wheels to access the brake drums.
2. Remove the Brake Drum
-
If the drum is loose, simply slide it off the hub.
-
If it is stuck due to corrosion or shoe pressure, use release holes (if available) to retract the shoes or tap the drum gently with a mallet.
-
Penetrating oil may help loosen rusted drums.
3. Inspect Internal Components
-
Check the condition of the brake shoes, springs, wheel cylinder, and backing plate.
-
Look for signs of wear, leaking fluid, or broken components.
-
If worn or damaged, replace shoes and hardware along with the drum.
4. Clean the Hub
-
Clean the hub face with a wire brush to ensure the new drum seats evenly.
-
Remove all rust and debris to avoid runout or imbalance.
5. Fit the New Brake Drum
-
Align the drum with the wheel studs and slide it into place.
-
If the fit is tight, verify that the shoes are retracted fully. Minor adjustments may be needed through the backing plate access slot.
6. Reassemble
-
Reinstall the wheel and hand-tighten the lug nuts.
-
Lower the vehicle and torque the lug nuts to the manufacturer’s specifications.
-
Pump the brake pedal to restore hydraulic pressure and seat the brake shoes.
7. Test the Brakes
-
Conduct a low-speed test drive in a safe area.
-
Listen for any noise and observe braking performance.
-
Recheck the pedal feel and ensure the parking brake holds properly.
Follow us on Facebook for more parts.

Reviews
Clear filtersThere are no reviews yet.