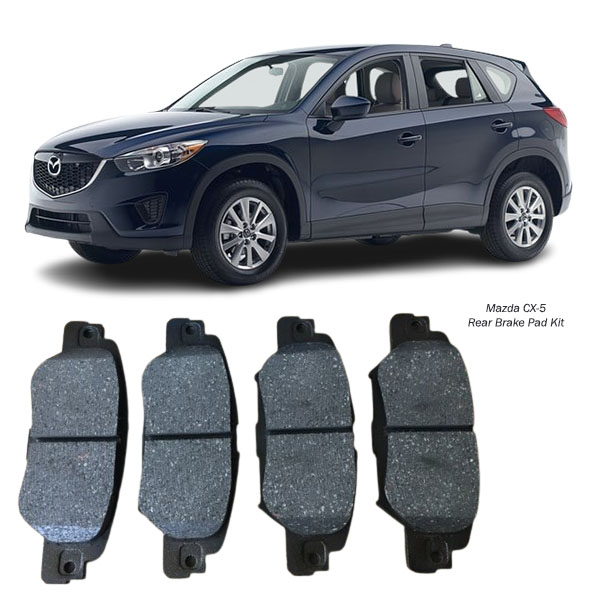
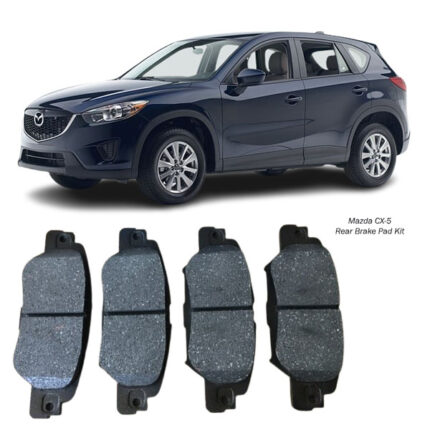
Get Mazda CX-5 Rear Brake Pad Kit D3171 in Kenya
The rear brake pad kit is a vital component of a vehicle’s braking system, designed to provide consistent stopping power, reduce braking noise, and ensure safe, controlled deceleration. It consists of friction pads that press against the rear brake discs or drums (depending on the braking system), converting kinetic energy into heat to slow down or stop the vehicle.
Rear brake pads operate as part of a hydraulic braking circuit and are generally responsible for a smaller percentage of the braking force compared to front brake pads. However, their role in overall vehicle safety, braking stability, and brake balance is crucial, especially under load, during downhill driving, or during emergency stops.
Components Included in a Rear Brake Pad Kit
A complete rear brake pad kit usually contains:
-
A pair of rear brake pads (inner and outer per wheel)
-
Anti-squeal shims or backing plates
-
Wear indicators (mechanical or electronic, depending on vehicle)
-
Brake pad clips or hardware kits (optional but highly recommended)
-
Grease or lubricant sachet (for specific contact points)
Each of these components is designed to work together to ensure optimal braking performance, quiet operation, and extended pad life.
Benefits of a Good Rear Brake Pad Kit
-
Safe and Consistent Braking
A high-quality rear brake pad kit ensures that the vehicle can slow down smoothly and safely in various driving conditions. Whether in heavy traffic, wet roads, or downhill situations, effective rear braking adds stability and control. -
Even Brake Pad Wear
A good kit comes with correctly designed pads that apply even pressure on the disc surface, reducing the risk of premature wear and uneven braking response. -
Low Noise and Vibration
Properly manufactured pads with noise-dampening shims minimize the occurrence of brake squeal, grinding sounds, and vibrations that can occur during braking. -
Longer Pad and Rotor Life
Using high-grade materials, good rear brake pads generate less heat and wear on the rotors, which extends the service life of both components and reduces long-term maintenance costs. -
Improved Driving Comfort
Smooth braking reduces jerks and uncomfortable stops, enhancing overall driving comfort for passengers. -
Dust Reduction
Quality rear brake pads create less brake dust, keeping the wheels and caliper area cleaner, which also helps prevent corrosion over time.
Drawbacks of Using Worn or Low-Quality Brake Pads
-
Increased Stopping Distance
Worn or poor-quality brake pads are less effective at creating friction, which can result in dangerously long stopping distances—especially under emergency braking. -
Brake Noise
Inferior brake pads often lack proper shims and insulators, leading to squeaking, squealing, or grinding noises during operation. -
Uneven Braking
Low-grade pads may wear inconsistently or glaze over, causing the vehicle to pull to one side when braking or experience pulsating sensations. -
Brake Fade
Subpar pads may not withstand high temperatures during braking, leading to brake fade, where braking power diminishes during prolonged use. -
Rotor Damage
Some poor-quality pads are excessively abrasive or overly soft. This can lead to scoring, warping, or pitting on the brake rotor surface, requiring more costly repairs. -
Reduced ABS/ESP Functionality
In modern vehicles, worn rear brake pads can reduce the effectiveness of ABS (Anti-lock Braking System) or ESP (Electronic Stability Program), as sensor readings become inconsistent or inaccurate under poor braking conditions.
Signs of Worn Rear Brake Pads
-
Squealing or Screeching Noises
When the brake pad friction material wears thin, the built-in wear indicator makes contact with the rotor, creating a high-pitched sound to alert the driver. -
Dashboard Brake Warning Light
Vehicles with electronic wear sensors will illuminate a warning light on the dashboard when rear brake pads need replacing. -
Reduced Braking Performance
A noticeable decrease in braking efficiency or longer stopping times may indicate worn rear pads. -
Vibration or Pulsation
If the pads are unevenly worn or damaged, the driver may feel vibrations through the brake pedal during braking. -
Visible Pad Thickness
A quick visual inspection through the wheel spokes can reveal if the pads are worn thin (less than 3mm of material left). -
Brake Dust Build-Up
Increased brake dust on the rear wheels can suggest deteriorating pad material.
Installing a Rear Brake Pad Kit: Basic Procedure
Note: Always follow the vehicle manufacturer’s service manual. Brake jobs require precision and safety precautions.
-
Lift and Secure the Vehicle
Safely raise the rear of the vehicle using a jack and jack stands. Remove the rear wheels to access the braking system. -
Remove the Caliper
Unbolt the brake caliper and carefully suspend it using a hook or wire to avoid stress on the brake line. Do not let it hang freely. -
Remove the Old Pads
Slide the old brake pads out of the caliper bracket. If equipped, remove any old shims or clips. -
Inspect Components
Check the condition of the rotors, caliper pins, and brake lines. Replace or service them as necessary. Clean the contact areas with brake cleaner. -
Install New Pads
Apply the included grease to the contact points, install any anti-squeal shims, and insert the new pads. Refit or replace the pad clips if needed. -
Compress the Caliper Piston
Use a suitable tool to retract the caliper piston to accommodate the new, thicker brake pads. -
Reassemble and Test
Bolt the caliper back in place, reattach the wheels, and lower the vehicle. Pump the brake pedal to restore proper pressure before driving. Check for any leaks, sounds, or brake warning lights.
Maintenance Tips
-
Always replace brake pads in pairs to maintain even braking performance.
-
Check and replace brake fluid as recommended (usually every 2–3 years).
-
Regularly inspect pads during oil changes or every 10,000–15,000 km.
-
Avoid aggressive braking whenever possible to extend pad life.
Follow us on Facebook for more parts.


