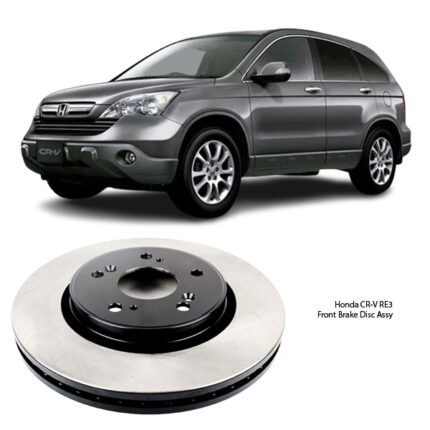

Get Mazda 2 DY Front Brake Disc Assy RN1109V in Kenya
The Front Brake Disc Assembly is a core component of a vehicle’s braking system, responsible for converting kinetic energy into thermal energy through friction. Mounted on the front wheel hubs and rotating with the wheels, the front brake discs play a vital role in the majority of braking force during deceleration. When the driver applies the brakes, calipers clamp the brake pads against the disc’s surface, generating the friction necessary to slow down or stop the vehicle.
Made from durable, heat-resistant materials such as cast iron or composite alloys, front brake discs must withstand high temperatures and repeated cycles of stress. The quality and condition of the front brake disc are directly linked to braking performance, safety, and overall driving comfort.
Importance of a High-Quality Front Brake Disc Assembly
Unlike the rear brakes, which handle less of the stopping force, front brakes manage a significant portion of the braking load. A properly engineered front brake disc:
-
Ensures reliable, even stopping power
-
Reduces stopping distances
-
Improves vehicle control, especially during emergency stops
-
Maintains consistent performance under high temperatures
A front brake disc must be resistant to warping, wear, and cracking to deliver effective braking performance over time.
Benefits of a High-Quality Front Brake Disc
1. Superior Friction Surface
A good disc provides an even, smooth surface for the brake pads to grip. This improves braking efficiency, reduces vibration, and enables responsive braking.
2. Thermal Stability
High-quality discs are designed to disperse heat rapidly. Ventilated or slotted designs enhance airflow, minimizing the risk of heat build-up which can lead to brake fade during prolonged or aggressive braking.
3. Consistent Thickness and Balance
Precision machining ensures even thickness across the disc surface, reducing the likelihood of vibrations or pedal pulsations. A balanced disc prevents wobble and protects wheel bearings and suspension components.
4. Longer Service Life
Superior material quality and manufacturing standards ensure that the disc resists scoring, grooving, and corrosion, offering a longer operational life even under demanding driving conditions.
5. Quiet and Smooth Operation
Premium brake discs reduce noise during braking by minimizing uneven wear and promoting smooth pad engagement.
Drawbacks of Low-Quality or Damaged Front Brake Discs
Poorly manufactured or worn front brake discs can seriously compromise the braking system. The drawbacks include:
1. Inconsistent Braking
Low-grade discs can produce uneven braking force, resulting in pulling to one side or unpredictable stopping distances.
2. Brake Fade
Insufficient heat dissipation leads to a drop in braking performance as the disc overheats. This is especially dangerous on long downhill descents or during repeated braking in traffic.
3. Increased Pad Wear
Rough, uneven, or contaminated disc surfaces can wear down brake pads rapidly and unevenly, requiring more frequent replacements.
4. Vibration and Noise
A warped or imbalanced disc may cause steering wheel vibration, brake pedal pulsation, or loud squealing and grinding noises during braking.
5. System Strain
Uneven braking force increases stress on suspension, steering, and brake hydraulic components, potentially leading to costly repairs and reduced driving comfort.
Signs That the Front Brake Disc Needs Replacement
To maintain optimal braking performance and vehicle safety, it is essential to monitor the condition of the front brake discs. Key signs of wear or damage include:
1. Scoring and Grooves
Visible lines, scratches, or ridges on the disc surface can reduce braking effectiveness and increase pad wear.
2. Warping
Brake disc warping, often caused by excessive heat, results in vibration or pulsation felt through the brake pedal when braking.
3. Thickness Variation
A disc with uneven thickness can cause inconsistent braking force and lead to brake noise or pedal pulsation.
4. Overheating Marks
Bluish discoloration on the disc surface indicates overheating, which can weaken the disc material and compromise braking safety.
5. Brake Noise
Grinding or squealing sounds when braking can point to disc damage or contamination. In many cases, these noises are caused by excessive wear or metal-to-metal contact between the pad and disc.
6. Extended Stopping Distance
If braking takes longer than usual or feels less responsive, the front brake discs may have deteriorated to the point where replacement is necessary.
Fitting the Front Brake Disc Assembly
Replacing the front brake disc assembly requires mechanical knowledge, appropriate tools, and adherence to safety practices. The general process is outlined below:
1. Preparation
-
Park the vehicle on a flat surface.
-
Engage the parking brake and place wheel chocks behind the rear wheels.
-
Loosen the front wheel lug nuts slightly.
2. Lifting and Removing the Wheel
-
Use a jack to lift the front of the vehicle and support it with jack stands.
-
Remove the wheel to access the brake components.
3. Caliper Removal
-
Locate and remove the caliper bolts using a suitable socket.
-
Carefully lift the caliper away from the disc and suspend it using a hook or wire to avoid stressing the brake hose.
-
Remove the brake pads from the caliper bracket.
4. Caliper Bracket Removal (If Required)
-
Some vehicles require the caliper bracket to be removed to release the disc. Unbolt and remove the bracket accordingly.
5. Removing the Old Brake Disc
-
If the disc is rusted or seized to the hub, apply penetrating oil around the hub area.
-
Gently tap the disc with a mallet to loosen it and slide it off the hub.
6. Cleaning the Hub Surface
-
Clean the wheel hub with a wire brush to remove rust or debris.
-
Ensure the mating surface is flat and free of contaminants to prevent disc runout.
7. Installing the New Brake Disc
-
Align the new disc with the hub and secure it in place (using retaining screws if applicable).
-
Ensure the disc sits flush and rotates smoothly.
8. Reassembling the Brake System
-
Reinstall the caliper bracket if it was removed.
-
Insert the brake pads and position the caliper back over the disc.
-
Tighten all bolts to the specified torque settings.
9. Final Checks
-
Reinstall the wheel and tighten lug nuts.
-
Lower the vehicle and torque the lug nuts to specification.
-
Pump the brake pedal several times to ensure the brake pads are seated properly.
10. Test Drive
-
Perform a low-speed test drive to check for braking performance, noise, or vibration.
Follow us on Facebook for more parts.

Reviews
Clear filtersThere are no reviews yet.