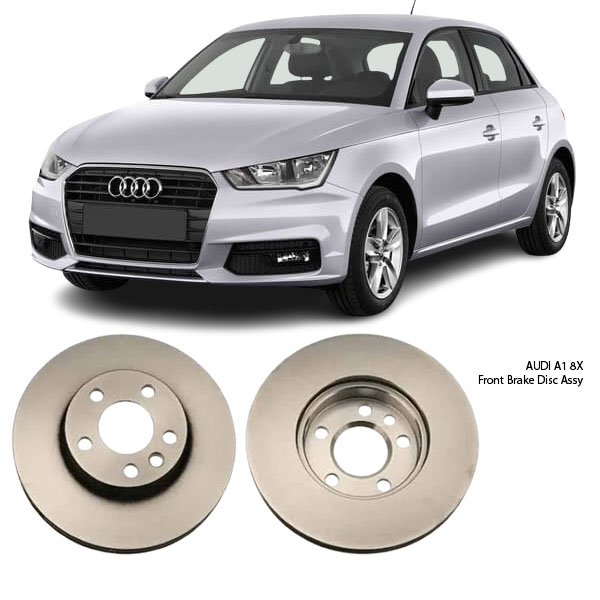
Get AUDI A1 8X Front Brake Disc Assy RN1379V in Kenya
A Front Brake Disc Assembly is a crucial component of a disc brake system, responsible for providing the friction surface against which brake pads clamp to slow down or stop wheel rotation. It is typically a round, flat metal disc mounted to the wheel hub, rotating in unison with the wheel. When braking is applied, the brake caliper squeezes the pads against both sides of the disc, converting kinetic energy into thermal energy through friction. This process enables smooth, reliable deceleration.
The front brake disc assembly often includes additional design elements such as ventilation vanes for cooling or protective coatings to resist corrosion. It plays a significant role in overall braking efficiency, especially as the front wheels handle the majority of braking force.
Benefits of a Good Front Brake Disc Assembly
-
Efficient Braking Performance
A high-quality brake disc offers a smooth, consistent surface for brake pads, leading to quicker and more reliable stopping power under various conditions. -
Heat Dissipation
Well-designed discs, especially ventilated ones, manage heat effectively during braking. This reduces the risk of brake fade and maintains braking efficiency during prolonged or repeated use. -
Reduced Noise and Vibration
A properly machined and balanced disc minimizes vibrations and brake noise, leading to a quieter, more comfortable braking experience. -
Durability and Longevity
Quality discs are made from strong, thermally stable materials that resist warping, cracking, and surface degradation. They can withstand thousands of braking cycles before needing replacement. -
Improved Pedal Feel
With consistent disc thickness and surface quality, brake pedal feedback is firmer and more responsive, enhancing driving control. -
Safety and Stability
Since brake discs affect how evenly and effectively the braking force is applied, a good disc assembly ensures straight-line braking and reduces stopping distance, contributing to road safety. -
Compatibility with Advanced Braking Systems
Modern brake discs are designed to work seamlessly with ABS (Anti-lock Braking System) and electronic stability systems, helping maintain traction and control.
Disadvantages of a Poor or Failing Brake Disc
-
Reduced Braking Efficiency
A worn, warped, or low-quality disc may not allow optimal friction with the pads, resulting in longer stopping distances. -
Brake Fade Under Load
Inferior discs with poor heat dissipation capabilities can overheat easily, causing brake fade, especially during long descents or emergency braking. -
Increased Noise and Vibration
Uneven surfaces or out-of-balance discs can cause squealing, grinding, or pulsating during braking, affecting comfort and performance. -
Uneven Pad Wear
Poor disc condition can lead to uneven contact with the brake pads, causing one side to wear faster and possibly leading to further system imbalance. -
Higher Maintenance Costs
Using low-grade or poorly maintained discs may lead to damage to related components like calipers or pads, increasing repair and replacement costs over time.
Signs of a Worn-Out Front Brake Disc
-
Vibration or Pulsation When Braking
This often indicates disc warping or uneven surface wear, felt through the brake pedal or steering wheel during braking. -
Squealing or Grinding Noise
Metal-on-metal contact due to extreme wear or scoring can produce noticeable noise, indicating the disc and pads need inspection. -
Visible Scoring or Cracks
Deep grooves or hairline cracks on the disc surface are signs of excessive wear or overheating and may compromise braking performance. -
Increased Stopping Distance
If the vehicle requires more time or space to come to a complete stop, the brake disc may be glazed, warped, or too thin. -
Brake Pad Wear Patterns
Uneven pad wear often points to surface irregularities or improper disc alignment. -
Brake Warning Light
In some vehicles, sensor systems detect when the disc or pad condition drops below acceptable standards, triggering a warning light.
How to Change a Front Brake Disc Assembly
Note: Brake system components should be replaced or serviced by qualified personnel to ensure safety and system integrity. Below is a general overview of the replacement process.
Step 1: Safety First
-
Park the vehicle on a flat surface.
-
Engage the parking brake.
-
Use wheel chocks for added stability.
-
Loosen the front wheel lug nuts slightly before lifting.
Step 2: Raise and Secure
-
Lift the front of the vehicle using a jack and place it securely on jack stands.
-
Remove the front wheels.
Step 3: Remove Brake Caliper
-
Unbolt the brake caliper and carefully hang it to the suspension using a wire or hook to avoid strain on the brake line.
-
Do not let the caliper dangle freely.
Step 4: Remove Old Brake Disc
-
If present, remove any retaining screws on the disc.
-
Gently tap the disc with a rubber mallet to loosen it if stuck due to rust or debris.
-
Slide the old disc off the wheel hub.
Step 5: Prepare for Installation
-
Clean the wheel hub surface with a wire brush or sandpaper to ensure smooth seating of the new disc.
-
Check for rust, debris, or surface irregularities.
Step 6: Install New Disc
-
Position the new brake disc on the hub.
-
Align any retaining screws and tighten as required.
Step 7: Reinstall Caliper and Pads
-
Check the condition of brake pads; replace if worn.
-
Reinstall the caliper and ensure all bolts are torqued to specification.
Step 8: Reattach Wheel and Lower Vehicle
-
Put the wheel back on and hand-tighten the lug nuts.
-
Lower the vehicle to the ground and fully tighten the lug nuts in a star pattern.
Step 9: Test Brakes
-
Before driving, pump the brake pedal a few times to seat the pads against the new disc.
-
Perform a low-speed brake test to ensure proper operation.
Follow us on Facebook for more parts.


Reviews
Clear filtersThere are no reviews yet.