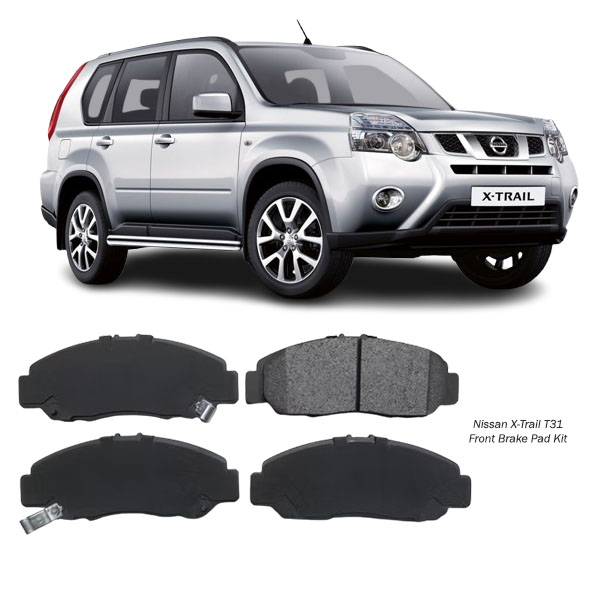
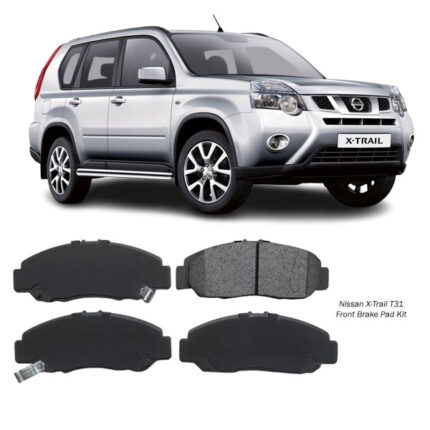
Get Nissan Xtrail T31 Front Brake Pad Kit D1276 in Kenya
The front brake pad kit is a vital part of a vehicle’s braking system, responsible for converting kinetic energy into thermal energy through friction, thereby slowing down or stopping the vehicle. Since the front brakes handle a significant portion of braking force due to weight transfer during deceleration, the front brake pads are often subjected to more wear than the rear ones.
A brake pad kit typically includes a pair of front brake pads for each wheel, shims, anti-rattle clips, and sometimes wear indicators. These components are designed to work in harmony to ensure effective braking, reduce noise, and improve the overall lifespan of the braking system.
Purpose and Function of Front Brake Pads
Front brake pads press against the brake rotors (also known as discs) when the brake pedal is applied. This contact creates the friction necessary to decelerate the wheels. The pressure applied by the brake calipers, which house the pads, ensures that the frictional force is sufficient to safely slow the vehicle under various conditions.
The brake pad material is designed to handle extreme temperatures, mechanical pressure, and repeated use without significant degradation—although it is a consumable component that must be replaced periodically.
Main Components of a Front Brake Pad Kit
-
Friction Material
This is the working surface of the pad that contacts the brake rotor. It may be made from organic, semi-metallic, or ceramic compounds. -
Backing Plate
A steel plate that supports the friction material and connects to the brake caliper piston. -
Shims
Thin layers of metal or rubber placed behind the backing plate to reduce noise and vibrations. -
Clips and Springs
These hardware components help secure the pads in place and prevent rattling. -
Wear Indicators
Some kits include wear indicators, either mechanical (which squeal when the pad is low) or electronic (which trigger a dashboard warning).
Advantages of a Good Front Brake Pad Kit
-
Effective Braking Performance
High-quality pads offer excellent stopping power, ensuring safety in both everyday driving and emergency situations. -
Heat Resistance
Superior brake pads can withstand the high temperatures generated during braking without glazing, fading, or cracking. -
Low Noise and Vibration
Well-engineered kits include shims and anti-rattle hardware that minimize brake squeal and vibration during use. -
Consistent Friction
Quality pads maintain consistent friction levels under various conditions, from cold starts to aggressive driving. -
Longer Lifespan
Durable friction material ensures slower wear and longer service intervals. -
Rotor Protection
The right brake pad compound helps prevent excessive rotor wear, maintaining rotor integrity for longer periods. -
Clean Operation
Some pads are designed to produce less brake dust, keeping wheels cleaner and reducing airborne particles.
Disadvantages of Poor-Quality or Worn-Out Brake Pads
-
Reduced Stopping Power
Inadequate or worn-out pads can dramatically increase stopping distances, compromising safety. -
Brake Fade
Poor-quality pads may overheat quickly, leading to reduced friction (brake fade) during repeated or prolonged braking. -
Noise Issues
Cheap or damaged pads often produce squealing, grinding, or rattling noises due to inadequate materials or missing hardware. -
Increased Rotor Wear
Abrasive or metallic pads without proper formulation may gouge or warp the brake rotors, leading to costly replacements. -
Vibration During Braking
Uneven pad wear or degraded components can cause brake pulsation or vibration, especially when braking at high speeds. -
Dust Buildup
Excessive brake dust from inferior materials can accumulate on wheels, creating a dirty appearance and possible corrosion over time.
Signs of Worn-Out Front Brake Pads
-
Squealing or Screeching Sounds
High-pitched noises when braking are often due to wear indicators contacting the rotor or the friction material being too thin. -
Grinding Noise
A metallic grinding sound usually indicates that the pads are completely worn down and the metal backing plate is contacting the rotor. -
Increased Stopping Distance
If it takes longer to bring the vehicle to a stop, the pads may be too thin or glazed from excessive heat. -
Vibration or Pulsation
Shaking through the steering wheel during braking may be due to uneven pad wear or warped rotors caused by failing brake pads. -
Brake Warning Light
Some vehicles are equipped with sensors that activate a warning light when the pads need replacing. -
Visual Inspection
If the friction material on the pad appears thinner than 3 mm or has visible cracks or uneven wear, replacement is needed. -
Pulling to One Side
Uneven pad wear can cause the vehicle to pull to one side during braking, indicating a need for inspection and replacement.
How to Replace Front Brake Pads
Tools and Materials Needed:
-
Jack and jack stands
-
Lug wrench
-
Socket and ratchet set
-
C-clamp or brake caliper tool
-
Brake cleaner
-
New front brake pad kit
-
Anti-seize or brake grease (optional)
Step-by-Step Replacement Process:
-
Park and Secure the Vehicle
Park on a flat surface, engage the handbrake, and block the rear wheels for safety. -
Lift the Front End
Use a jack to lift the front of the vehicle and secure it with jack stands. -
Remove the Front Wheels
Loosen the lug nuts and remove the wheels to expose the brake components. -
Access the Brake Caliper
Unbolt the caliper from the mounting bracket, but do not disconnect the brake hose. Suspend the caliper with a hook or wire to avoid stress on the hose. -
Remove Old Brake Pads
Slide out the worn pads from the caliper bracket. Inspect for uneven wear, cracks, or glazing. -
Compress the Caliper Piston
Use a C-clamp or caliper tool to gently push the piston back into the caliper. This creates space for the new, thicker pads. -
Install New Pads
Apply a small amount of brake grease to the backing plate and install the new pads into the bracket. Insert any included shims or clips as per instructions. -
Reinstall the Caliper
Bolt the caliper back over the new pads and ensure it moves freely without binding. -
Reattach Wheels and Lower Vehicle
Mount the wheels, hand-tighten the lug nuts, lower the vehicle, and then torque the nuts in a crisscross pattern. -
Pump the Brake Pedal
Press the pedal several times before driving to seat the pads and restore brake pressure. -
Test Drive
Drive at moderate speed and perform gentle braking to bed in the new pads and ensure proper function.
Follow us on Facebook for more parts.


